On this page
An agent opens the gallery an hour before the listing goes live and finds a crooked wall, a green cast in the kitchen or a car plate in the driveway. Fixing it then costs more than catching it before delivery: a redelivery, a delayed listing and a little less trust in your company.
For a real estate media company, quality control has to work at volume. This checklist covers what to look at in every photo, and how to decide which photos deserve a closer look.
The real estate photo QA checklist
1. Light
- Exposure is balanced across the room, without dark corners or glowing walls.
- Highlights and shadows keep their detail.
- Window views are visible and look natural, not grey or blown out.
2. Color
- White walls are white, not yellow, blue or green.
- No color cast from mixed light, especially in kitchens and bathrooms.
- Saturation is natural: grass, wood and sky look like they do in person.
3. Geometry
- Vertical lines are straight: door frames, walls, building edges.
- Perspective looks natural, without stretched furniture at the edges.
- Horizons and countertops are level.
4. Finish
- The photo is sharp where it matters.
- Noise is under control in shadows and dark rooms.
- No halos around windows, ghosting from moving trees or other artifacts.
5. Faithfulness
- Nothing was added, removed or changed compared with the original, unless the client asked for it.
- Any virtual staging or retouching is labeled where the portal asks for it.
- The photo shows the property as it is: views, size and condition.
6. Privacy
- License plates are blurred.
- No family photos, documents or names in frame.
- No people, and no photographer or tripod in mirrors and glass.
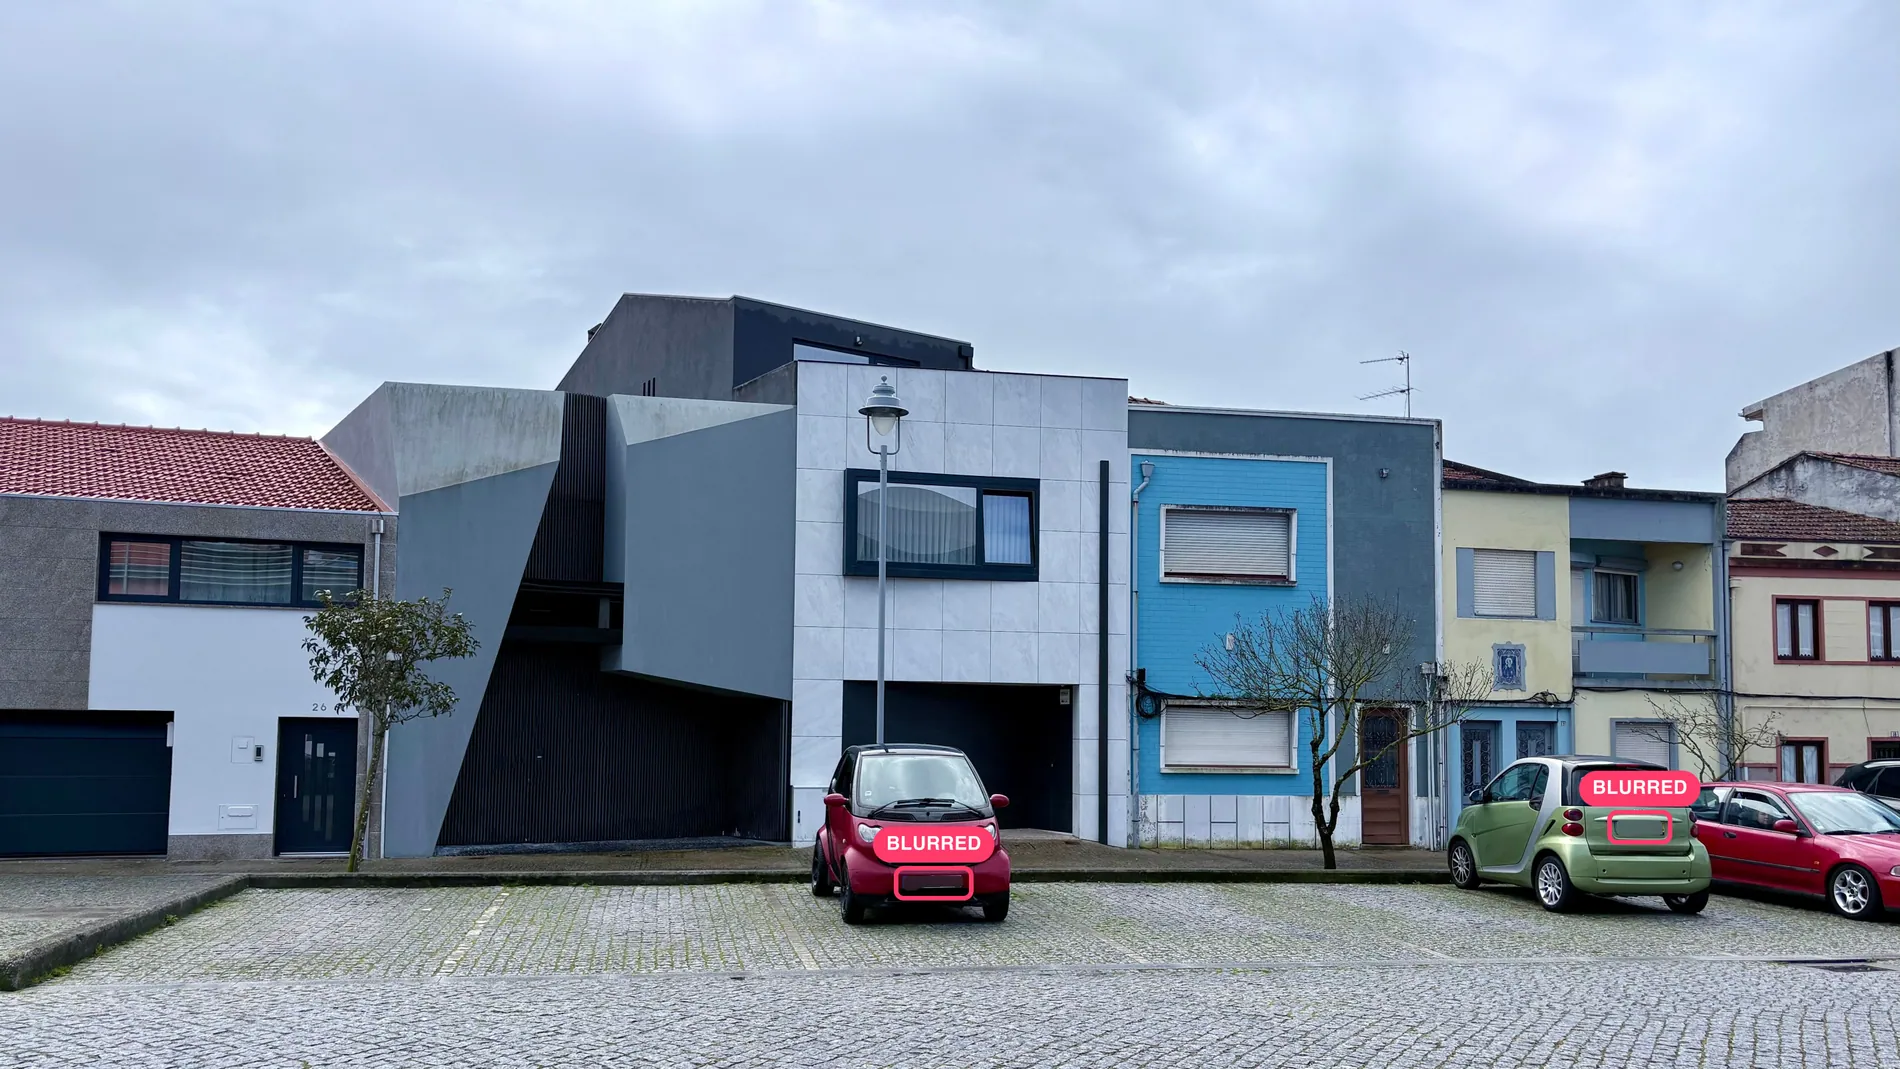
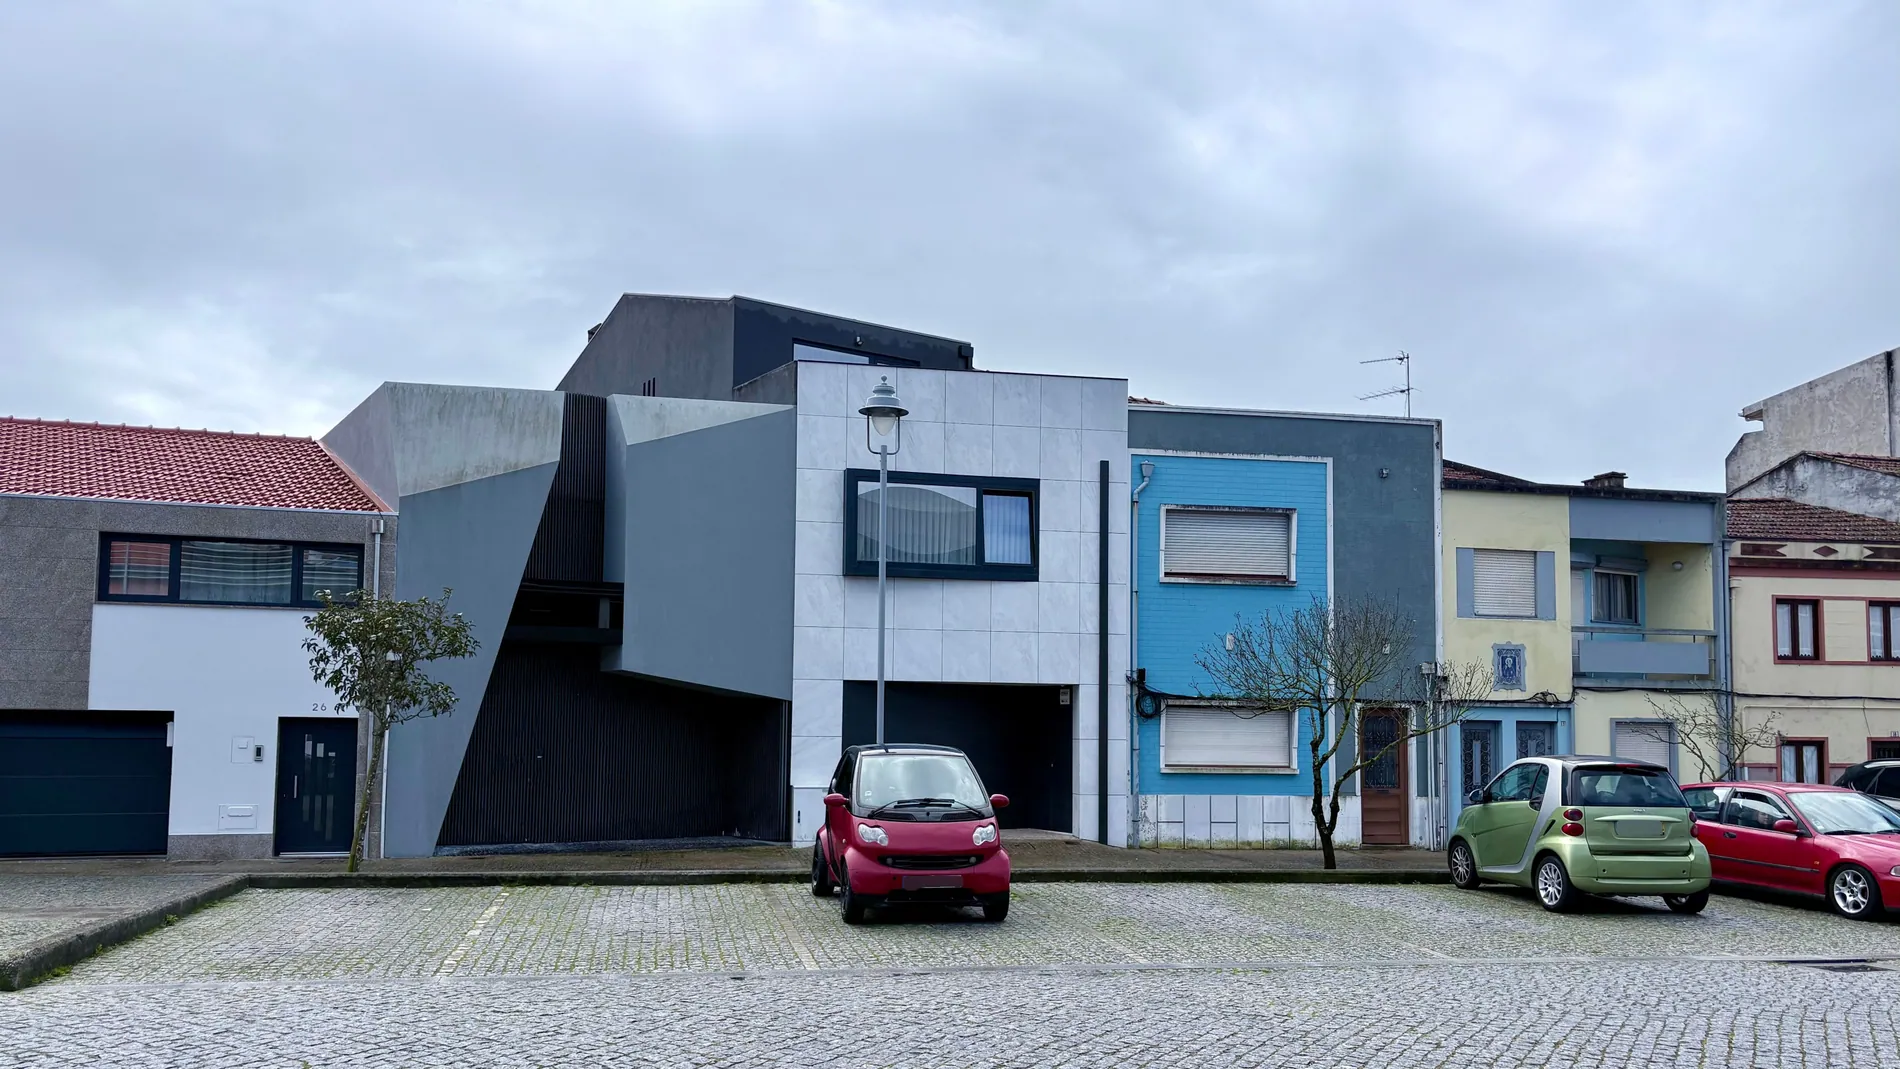
Privacy checks are the easiest to forget on a busy day. Our guide to real estate photo privacy covers what to hide in listing photos, and license plate blur can run on every shoot as part of the edit.
7. The delivery itself
- Every room and angle from the shot list is there.
- Photos are in a logical order, usually exterior first, then living areas, kitchen, bedrooms and bathrooms.
- Format and size are what the client expects. Stager AI delivers JPG or PNG at the full resolution of the camera files.
- The gallery goes to the right agent, for the right address.
How to review at volume
A team that delivers hundreds of photos a day can't give every photo the same attention. The trick is to look at all of them quickly and at a few of them carefully.
- 1Sort first. Run AI QA on the finished project. Each photo gets a score from 1 to 10 and a short note on what's good or what to check.
- 2Check the low scores closely. Read the note, compare with the original and fix or reprocess what needs it.
- 3Scan the rest. A quick look at the full gallery catches missing rooms and order problems that a per-photo score can't.
- 4Do the delivery checks from section 7, then send.
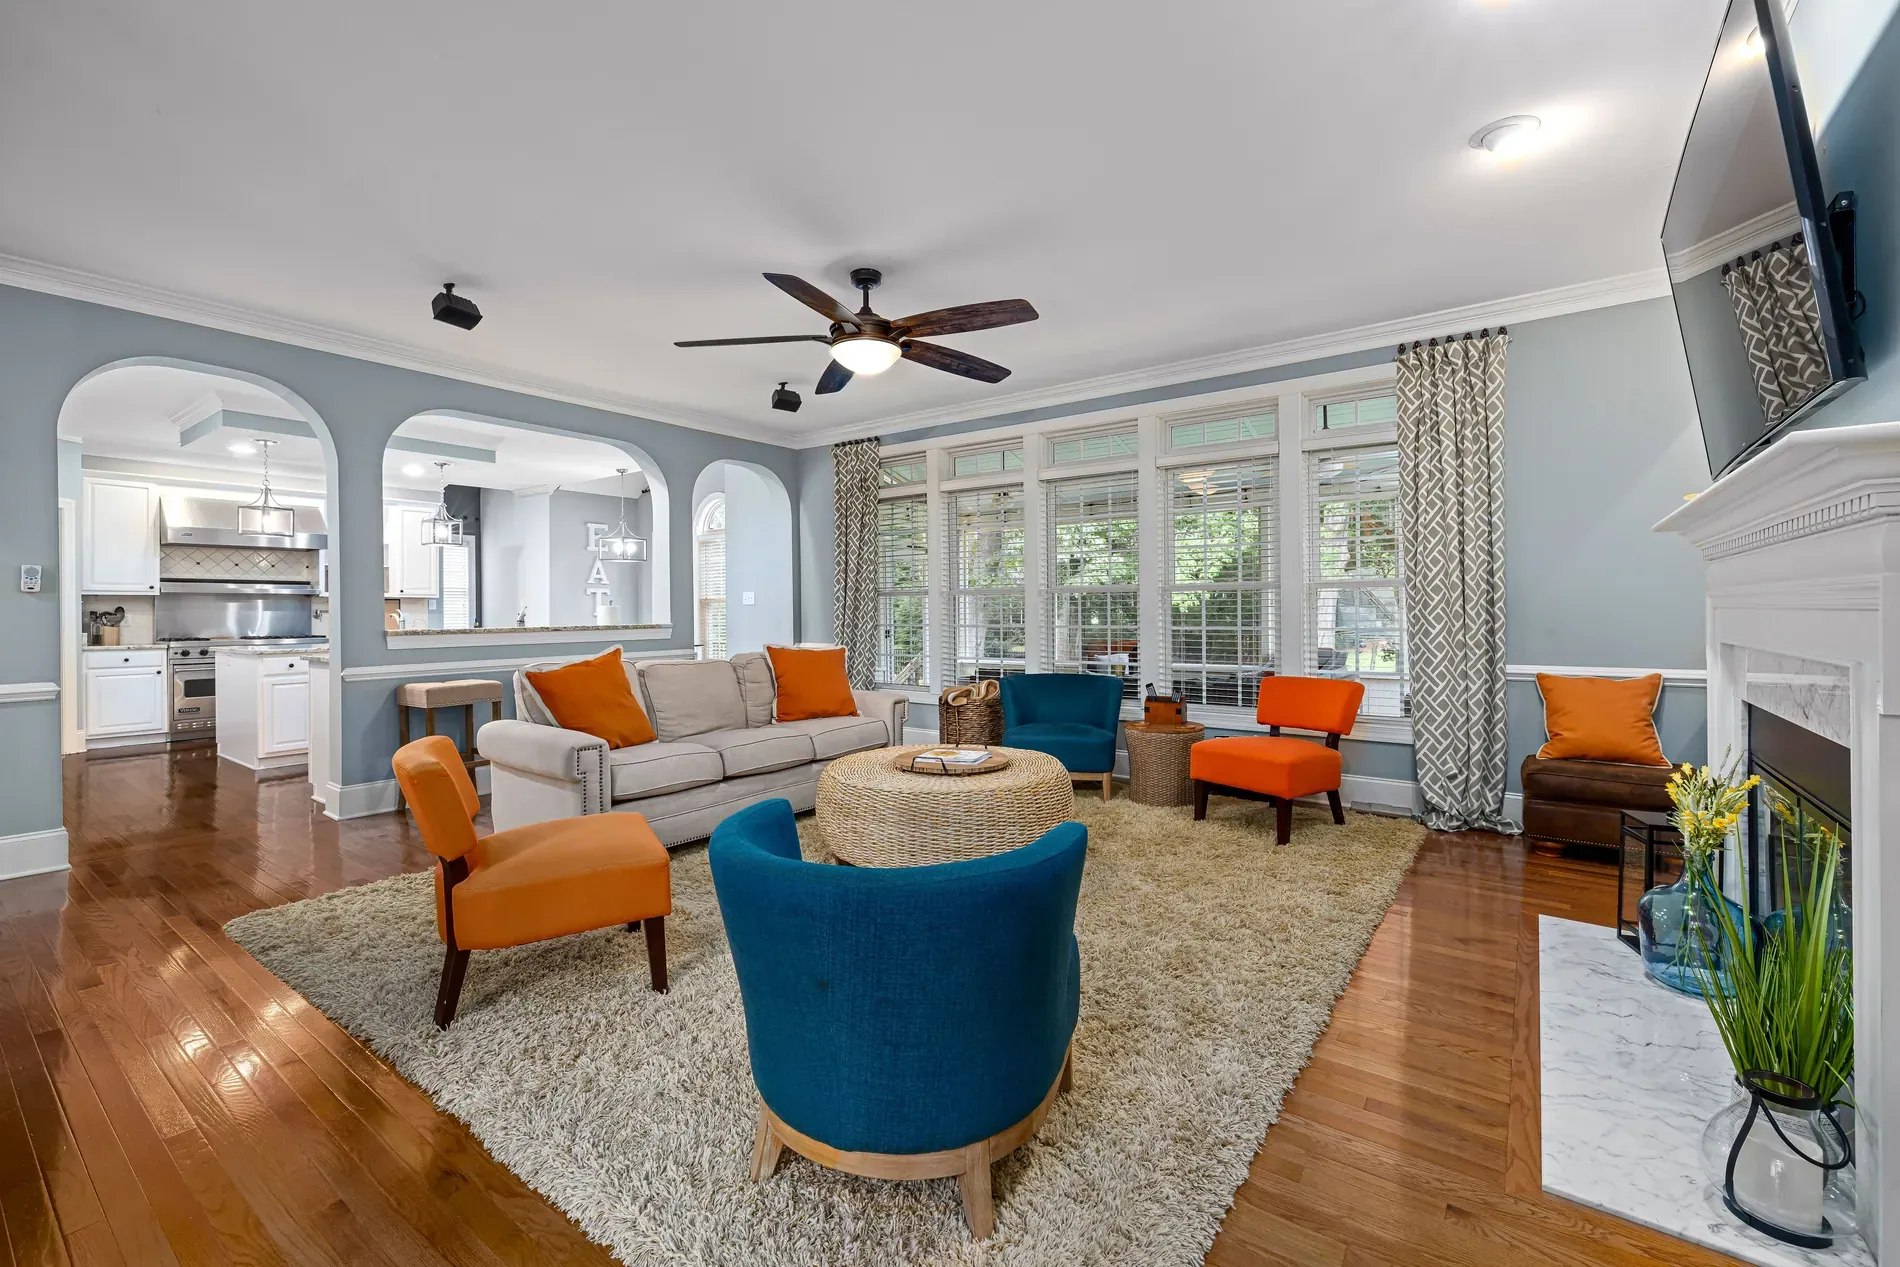
For HDR photos, AI QA compares the merged brackets with the final edit; for other edits, it compares the original with the latest result. It checks exposure, highlight and shadow detail, window views, white balance and color casts, saturation, straight verticals, sharpness, noise, halos and artifacts, and anything added, removed or changed. It doesn't use photo credits and it doesn't change your photos: you still decide what gets delivered.
Re-edit or reshoot?
When a photo fails a check, the first question is whether the problem is in the edit or in the capture. Re-editing is fast; a reshoot means another visit, so it's worth being sure.
| Problem | Usually fixed by | Reshoot if |
|---|---|---|
| Color cast, flat light | Re-editing | The brackets don't cover the scene's range |
| Leaning verticals | Perspective correction | The camera was far off level |
| Ghosting, double edges | Re-editing | Something moved a lot between brackets |
| Plate, name or reflection visible | Blur, retouching or photographer removal | It covers a large part of the photo |
| Missing room or angle | Nothing in editing | Always |
Turn QA into feedback photographers can use
QA catches problems in one gallery. Feedback stops them coming back. Keep it short and specific:
- Point to the photo, not the person. "Kitchen, photo 7: verticals lean" is easier to act on than "watch your verticals".
- Separate capture from edit. Tell photographers only about what they can change on site.
- Look for patterns. One leaning wall is a slip; the same issue on three shoots is a standard to explain again.
- Share the good ones too. Adding a photographer's best photos to the reference gallery shows everyone what you mean.
New photographers benefit most from this. Our real estate photographer onboarding checklist includes a review plan for the first shoots.
Prevent problems before QA
Most QA problems start earlier. Inconsistent brackets, a missing setting on one photographer's uploads or a different editing style on a rush job all show up at the end. Two posts in this series help upstream: how to keep one editing style across every photographer and our Dropbox workflow for real estate photography teams, where settings like plate blur are saved once for every shoot.
| Check | Look for | Fix |
|---|---|---|
| Light | Dark corners, blown windows | Reprocess, or check the brackets |
| Color | Casts on white walls | Reprocess with the house style |
| Geometry | Leaning verticals | Perspective correction, reshoot if far off level |
| Finish | Halos, ghosting, noise | Reprocess, check for movement between brackets |
| Faithfulness | Added or removed objects | Reprocess from the original |
| Privacy | Plates, names, reflections | Plate blur, retouching or photographer removal |
| Delivery | Missing rooms, wrong order | Check against the shot list before sending |
See how media companies use Stager AI to automate HDR editing and QA across every photographer.
Frequently asked questions
Light, color, geometry, finish, faithfulness to the original, privacy and the delivery itself: every room covered, the right order, format and size, and the right client.
Sort first, then look closely where it's needed. Run AI QA on each finished project to score every photo from 1 to 10, check the low scores carefully, then scan the full gallery for missing rooms and order.
No. AI QA only reads your photos and reports a score and a note. It doesn't use photo credits, and you decide what to fix, reprocess or deliver.
Blur license plates, remove family photos, documents and names from frame, and check that no people, photographer or tripod show up in mirrors and glass.